Showing posts with label paint. Show all posts

Monday, April 16, 2012

{latitude&longitude}


it's been months since my last post, i was a tad burned out for a bit, BUT it's SPRING! i am mega motivated, so i think you can look forward to a whole series of great outdoor projects in the near future. this is a really simple one i've been thinking about for awhile, and it's finally here.


i picked up this great old window, but really didn't have a plan for it. i knew i wanted it on the porch, and that i wanted it to have a unique finish. i've seen pillows, etc. with latitude and longitude printed on them, and i LOVE the idea of identifying your little teeny tiny piece of the world where you live and where your life happens, and displaying it. 


here are the steps:


1} i googled the latitude and longitude of our house
2} measure the window space where your numbers will go
3} divide that measurement by how many numbers you have to fit in it (you could do far less numbers than i did, even no decimal points, i liked the idea of being very specific)
4} copy/paste the latitude and longitude you're using into microsoft word, choose your font, and modify the text size until it's the size you need for the window.
5} print out the numbers, and trace each number onto the back of the page it's printed on with a thin sharpie
6} tape numbers in order to front of window, letting the tracing show through (this is so you can paint on the back of the window, protecting it more from the weather and giving it a more finished look)


numbers taped to the front of the window with traced side showing through
 7} trace numbers onto back of window using a sharpie


top row is traced, bottom is not yet. please excuse my husband and dog :)


i laid it down to trace the bottom row so i would have a steadier hand and not have to lay on the floor to reach it


sorry, not a phenomenal picture but you can see the outlines of all my numbers are done


i thought for a minute i might just leave it at an outline, but only for a minute.


8} use painter tape to protect your wood from the paint. be careful though, depending on the paint you use, you may have some acrylics trying to stick to your tape and go with it when you peel it off later, like i did.


i chose some cheap paint i found at michael's, patio paint because it's supposed to be weather-resistant, andi mixed it about 1:1 with the multi-purpose sealer (per the instructions) to have it seal more as well. hopefully it will hold up!


9} paint inside your numbers on the back of the window. i did 3 coats (letting them dry between, this paint dried pretty quickly), but depending on the level of 'rustic' or 'weathered' you are going for, you may end up doing only 2 or even 1. up to you! 

10} be careful removing your tape! start slowly by pulling the tape corner by the paint in the opposite direction and trying to cut the connection to the paint early so the paint doesn't want to stretch or drag as you pull.


TA-DA! unfortunately it's too heavy to hang without putting holes in the siding, which i want to avoid, but it looks great where it is! anyway it's a great start to the big plans i have for the porch and front of the house this summer.


i'm hoping it will be a nice conversation piece and i love that i can display my affection for my favorite place in the world!

Thursday, December 29, 2011

"The towels were so thick there I could barely close my suitcase." -Yogi Berra


Here is a fascinating tutorial on how to make the cutest little storage table out of an old suitcase you've ever seen. You'll need an old, hardback suitcase (check your favorite local thrift or consignment shop, I hit the jackpot at mine and found 3!!), table legs & leg plates (got all mine at Lowe's), and a screwdriver. I also stained and painted my table legs and used a piece of plywood inside the cases to sturdy the legs from the inside. I'll explain later.


a snapshot of my supplies at the beginning. 3 suitcases, a set of legs, and a set of plates for each.


close-up of one of the plates i got at Lowe's. they make angle top plates, where the legs will angle outward, or straight, where they will be totally vertical when attached.


they make table legs in all different sizes and styles. not a fantastic selection at Lowe's, but good enough for what i needed right away.


this suitcase could've done with all 4 plates being smaller, no need for the 2 heavy duty ones at the top, but they didn't have enough regulars in stock


i measured out where each one should go, marked with a pencil, and drilled the holes


i attached the legs before the board on the inside was in, just to make sure i liked the legs
i had 3 boards cut to fit inside the 3 suitcases, round the corners to make sure they'll go into it all the way. i either stained or painted them to match the legs.


painted them while they were attached


to attach the board on the inside, i placed that on a tray table (you can use a stool or anything that will keep the board snug against the bottom of the suitcase. you will screw in the plates at this time, so the board will be attached. sorry, for some reason i don't have any pictures to illustrate this step!!


view from bottom


view for inside after board is attached


now the plates are attached to something other than the thin bottom of the suitcase, and the inside has a nice, neat bottom for storage. no screws sticking out!


finito!!


this one was chosen by my sister as her birthday gift, she is quite happy with it in her living room. they are such unique pieces for any room, great storage and style.


here are some more pics of the other 2 i did at the same time:


i used angled top plates for the big one, i wanted the legs to be angled outward. these were the hardest for me to attach, but i don't think it was because of the plates, it was because the suitcase itself is old and warped.


the long legs just weren't working out at all!! it was way taller than i expected (you know i didn't measure first) and the warp in the bottom was making one of them stick out at the wrong angle.
stained while attached
these are straight plates and 7" legs
anyway, the little one worked out real nice.


i finally finished the big one, and decided on shorter legs. the warp doesn't affect the angle as much and it's the same height as the bed, so it's a nice little storage table at the end!
i just love it. it has all these stickers on it from travel boats in the 50's. it belonged to someone locally, the address card on the side is from here, and the suitcase was purchased by the consignment shop at the estate sale after the owner died at 104! i just love all that history.


January 7, 1954, sailing on the Cunard Line. in a stateroom. so cool!


Tuesday, November 22, 2011

{wall stenciling 101}


alrighty, nothing witty today just gettin down to brass tacks. i conquered painting the kitchen and bathroom last weekend, and decided to add some stenciling to the bathroom as well!

i loved the gray color i used for the kitchen, and decided it was time to take down that hideous nautical wallpaper border that was in my master bathroom and use the gray in there too. i thought it would look great next to the blue in the bedroom.


i've never stenciled anything before, but i'd heard that if done from floor to ceiling, it can make a room look bigger, which is a concern we have for our master bathroom later on (for selling purposes), so i thought i'd try it.


all the research i did on stencils when i was considering it a few months ago told me that good wall stencils will run you about $40, but i am fortunate to know someone who used a stencil and didn't want to rent it to me, but just
lend it...very nice! you can also make your own stencils out of contact paper, i considered that too but i have enough projects going on, eh? ok here we go!

BE-FORE!


hideous beautiful nautical border


ok here's the trick, i'd never removed wall-paper before. i took off the top layer (the vinyl layer) of the border, then sprayed the glue paper with a mixture of fabric softener and water in a spray bottle! it was magic. i could scrape it off within a minute. i was able to be kinda messy with it since i knew i was painting the walls after, but if you aren't, you'll want to be neater with it. keep a rag handy to wipe off the drips.


i figured while i was doing work i'd spackle the holes. this stuff is fantastic, i can paint over it in minutes!


step one: locate hole in wall


step 2: smear a generous helping of spackle onto/into hole


step 3: scrape & flatten with palette knife!


border totally removed!


sooo...i realized after i took all the stuff out of the bathroom that i had no idea how i was going to paint behind a toilet? so i taped it, i don't know what the procedure is, but this is what i did. *side note: i just got as far behind it as i could with the paint, no one will see it!!


taping the ceiling is a great idea. even when using an edger. but my tape wasn't sticking because of the fabric softener. oh well!


edger! best friend in painting a room. i do next to the ceiling, floor trim, around outlets, and corners with it!


gray is done!! time to stencil


supplies: step ladder, stencil paint color, kitchen/bathroom roller (4"), tape, paint brush, foam brush, paint tray.

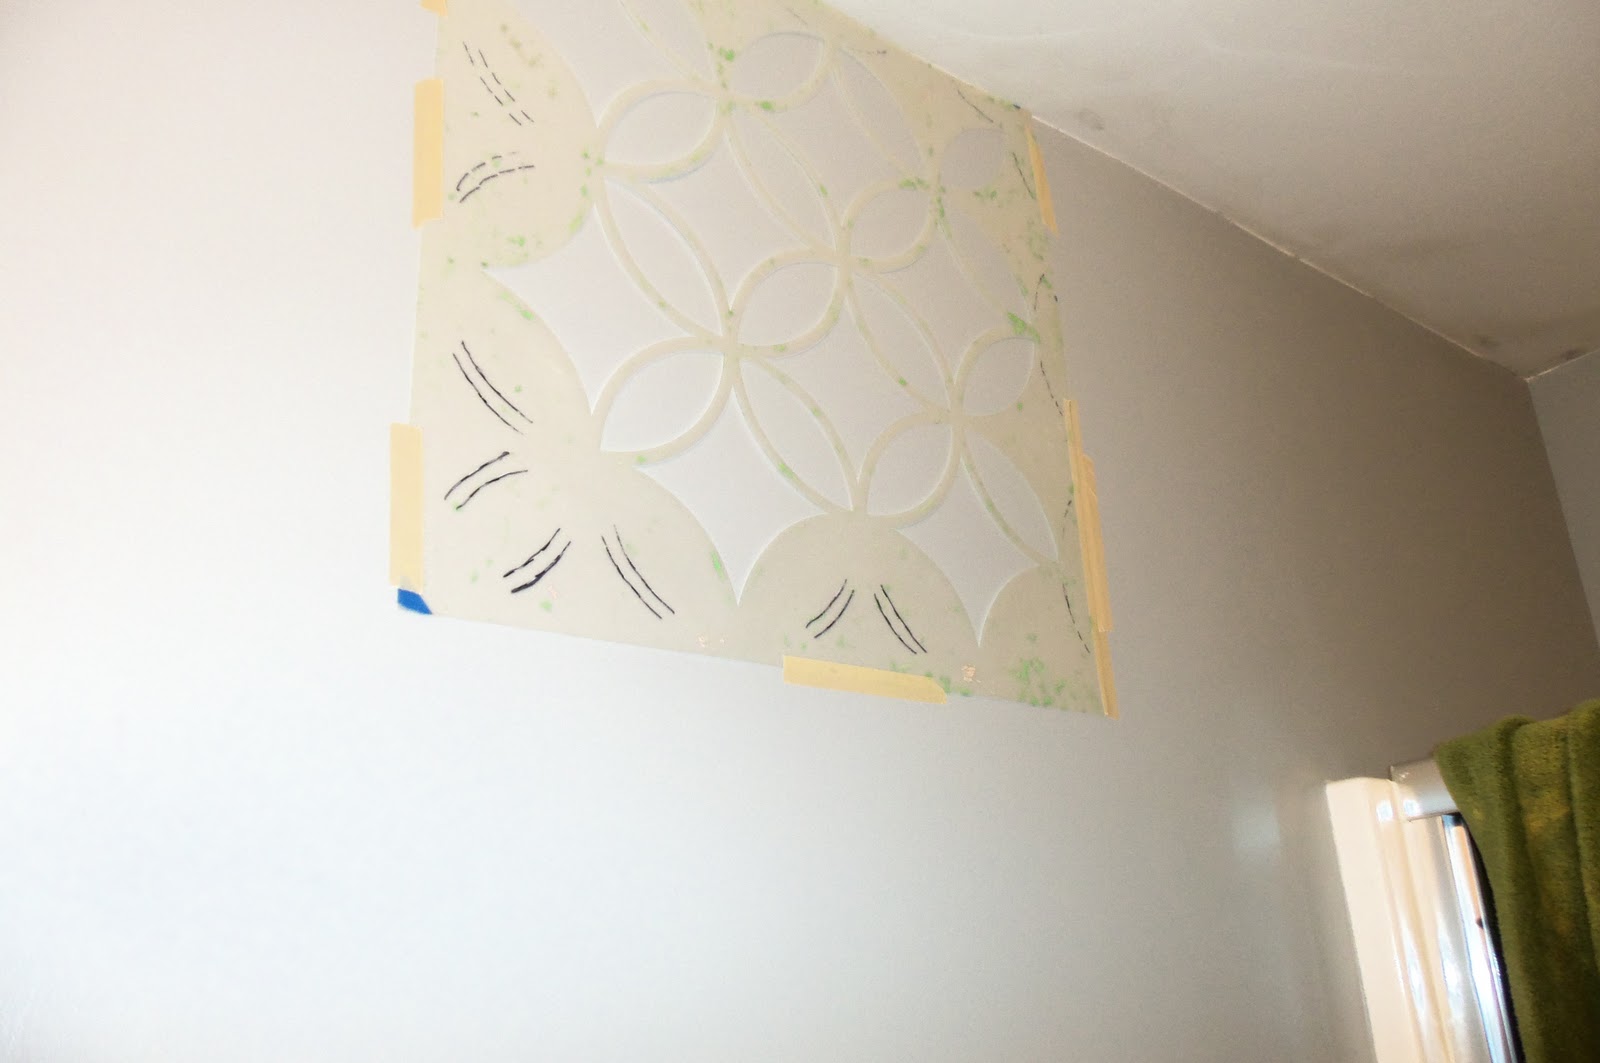
i tried to use the green frog tape (painting tape) to hold up the stencil and it did nothin! i used regular masking tape and it was great. i just kept adding rows of it toward the outside as i worked.

positioned in the center, i read that's where you're supposed to start when doing a whole wall, which was my original plan at this point.

nothing i read suggested using a roller for this, and i really think it should!! get a small roller like this one, i believe mine came from wal-mart. the trick is to use enough pressure to cover the wall with paint, but not enough pressure to move the stencil as you work, to avoid getting paint underneath the stencil. i can't imagine doing all this with a foam or regular paint brush!

be ALERT when you're lining up the stencils, or...

you get this!! ok, you're gonna love this- so i do this and i'm thinking, "aww fantastic! this is exactly where my towel hooks hang! i don't need to fix this."

well that was a lie...

...because when you get to this point you realize that you're going to have to line up the stencil on the sides too. God i am S-M-R-T. long story short, i repainted that area with the original (background gray) and re-stenciled it.

this is a good technique for the roller and stencil, i rolled at first where the pieces of the stencils meet to keep it even, then filled in after that.

2nd wall, i worked on this one while my re-paint job on the other one was drying! this is one row.

going back to fix the 1st wall

flipped stencil over to finish edge on 2nd wall. i already knew i wasn't going to do that whole wall.

just gotta do touch ups & finish the bottom! tape the bottom trim, it will save you!

i just got as close as i could with a roller and finished with a foam brush, you can see the dangers of not taping off the trim illustrated here.

this is a shot of the side trim by the door, i took the foam brush and held it straight and followed the line of the stencil, and that keeps the shape correct
for touch ups!


i used an art paintbrush to do touch ups, just use your wall color and go inside the lines with a small brush


shot into the mirror, i had planned to do the whole back wall, but i'm lazy smart and knew that since the mirror reflects the whole wall all the way to the shower when you're standing at the sink, so it creates a visual of a lot of stenciling when there really isn't that much. keep that in mind!


the color i used for the stencil is just white added to the original gray, so it keeps the same hue, it's just a different tint, which guarantees matching & unity in the design. i also used this color to put some accents on my white hook board, when i hung it back up it just looked too stark against the gray to me.

tah-dah! super cute and eye-catching. all in all, stenciling, plus touch ups, took me 2 nights


brand new bathroom for kassie!