
alrighty, nothing witty today just gettin down to brass tacks. i conquered painting the kitchen and bathroom last weekend, and decided to add some stenciling to the bathroom as well!
i loved the gray color i used for the kitchen, and decided it was time to take down that hideous nautical wallpaper border that was in my master bathroom and use the gray in there too. i thought it would look great next to the blue in the bedroom.
i've never stenciled anything before, but i'd heard that if done from floor to ceiling, it can make a room look bigger, which is a concern we have for our master bathroom later on (for selling purposes), so i thought i'd try it.
all the research i did on stencils when i was considering it a few months ago told me that good wall stencils will run you about $40, but i am fortunate to know someone who used a stencil and didn't want to rent it to me, but just lend it...very nice! you can also make your own stencils out of contact paper, i considered that too but i have enough projects going on, eh? ok here we go!
 |
| BE-FORE! |
 |
 |
| ok here's the trick, i'd never removed wall-paper before. i took off the top layer (the vinyl layer) of the border, then sprayed the glue paper with a mixture of fabric softener and water in a spray bottle! it was magic. i could scrape it off within a minute. i was able to be kinda messy with it since i knew i was painting the walls after, but if you aren't, you'll want to be neater with it. keep a rag handy to wipe off the drips. |
 |
| i figured while i was doing work i'd spackle the holes. this stuff is fantastic, i can paint over it in minutes! |
 |
| step one: locate hole in wall |
 |
| step 2: smear a generous helping of spackle onto/into hole |
 |
| step 3: scrape & flatten with palette knife! |
 |
| border totally removed! |
 |
| sooo...i realized after i took all the stuff out of the bathroom that i had no idea how i was going to paint behind a toilet? so i taped it, i don't know what the procedure is, but this is what i did. *side note: i just got as far behind it as i could with the paint, no one will see it!! |
 |
| taping the ceiling is a great idea. even when using an edger. but my tape wasn't sticking because of the fabric softener. oh well! |
 |
| edger! best friend in painting a room. i do next to the ceiling, floor trim, around outlets, and corners with it! |


 |
| gray is done!! time to stencil |

 |
| supplies: step ladder, stencil paint color, kitchen/bathroom roller (4"), tape, paint brush, foam brush, paint tray. |
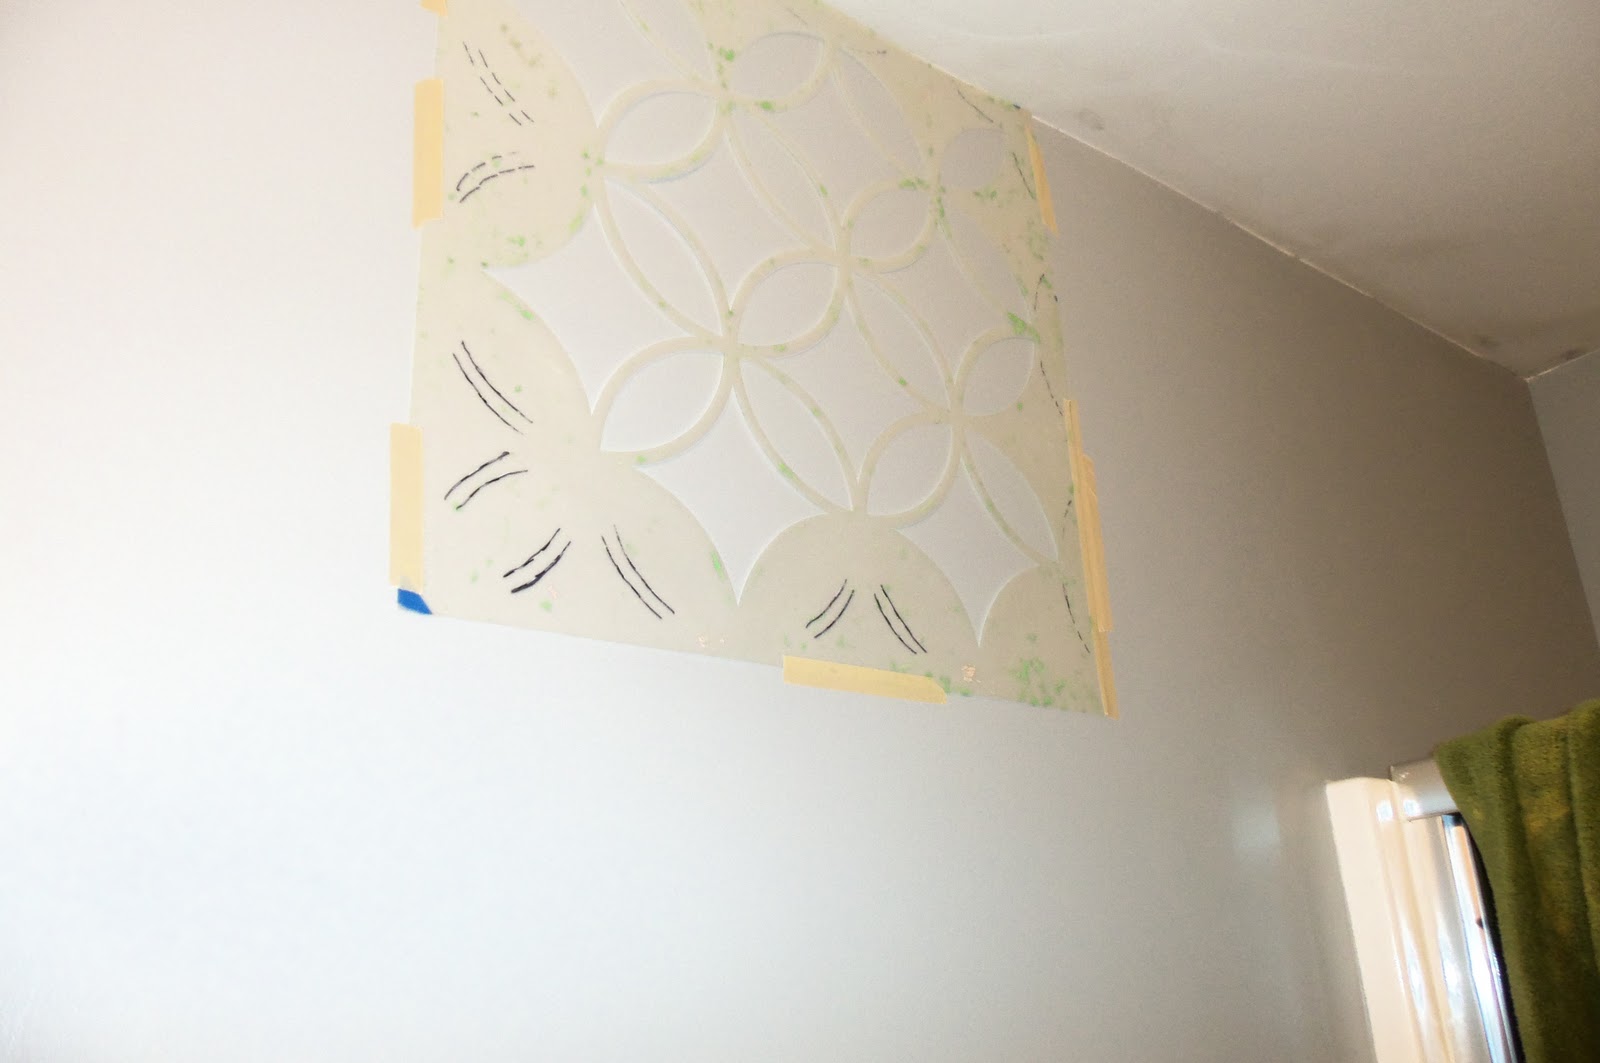 |
| i tried to use the green frog tape (painting tape) to hold up the stencil and it did nothin! i used regular masking tape and it was great. i just kept adding rows of it toward the outside as i worked. |
 |
| positioned in the center, i read that's where you're supposed to start when doing a whole wall, which was my original plan at this point. |
 |
| nothing i read suggested using a roller for this, and i really think it should!! get a small roller like this one, i believe mine came from wal-mart. the trick is to use enough pressure to cover the wall with paint, but not enough pressure to move the stencil as you work, to avoid getting paint underneath the stencil. i can't imagine doing all this with a foam or regular paint brush! |
 |
| be ALERT when you're lining up the stencils, or... |
 |
| you get this!! ok, you're gonna love this- so i do this and i'm thinking, "aww fantastic! this is exactly where my towel hooks hang! i don't need to fix this." |
 |
| well that was a lie... |
 |
| ...because when you get to this point you realize that you're going to have to line up the stencil on the sides too. God i am S-M-R-T. long story short, i repainted that area with the original (background gray) and re-stenciled it. |
 |
| this is a good technique for the roller and stencil, i rolled at first where the pieces of the stencils meet to keep it even, then filled in after that. |
 |
| 2nd wall, i worked on this one while my re-paint job on the other one was drying! this is one row. |
 |
| going back to fix the 1st wall |
 |
| flipped stencil over to finish edge on 2nd wall. i already knew i wasn't going to do that whole wall. |
 |
| just gotta do touch ups & finish the bottom! tape the bottom trim, it will save you! |
 |
| i just got as close as i could with a roller and finished with a foam brush, you can see the dangers of not taping off the trim illustrated here. |
 | ||
this is a shot of the side trim by the door, i took the foam brush and held it straight and followed the line of the stencil, and that keeps the shape correct
|

 |
| i used an art paintbrush to do touch ups, just use your wall color and go inside the lines with a small brush |

 |
| shot into the mirror, i had planned to do the whole back wall, but i'm |
 |
| the color i used for the stencil is just white added to the original gray, so it keeps the same hue, it's just a different tint, which guarantees matching & unity in the design. i also used this color to put some accents on my white hook board, when i hung it back up it just looked too stark against the gray to me. |
|
| tah-dah! super cute and eye-catching. all in all, stenciling, plus touch ups, took me 2 nights |
 |
| brand new bathroom for kassie! |
No comments:
Post a Comment